
Mobile site element identification on emulator or device

When writing automated test for desktop web application then it is quite easy to identify application elements. Almost all popular browsers have built-in developer tool bar to facilitate the element identification.
It is also quite easy to identify element locator for mobile app by appium directly for ios and android apps (or UIautomatorviewer for android apps on Ubuntu). But how do you identify application elements for mobile site? Chrome browser comes for our rescue. Chrome can be used to identify mobile site elements loaded on a mobile device or emulator.


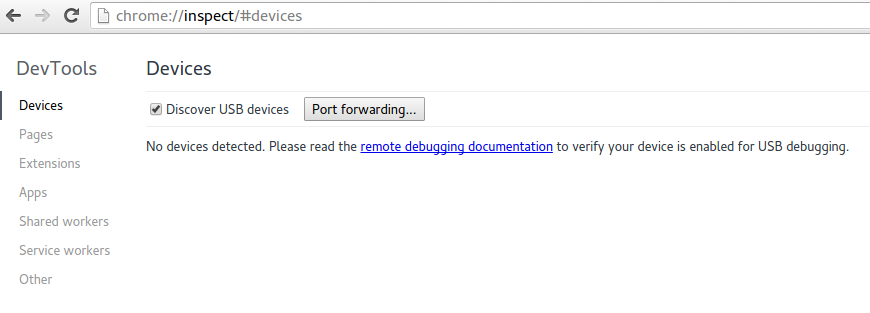
Launch chrome:/inspect on the chrome browser and you would see following screen when no device/emulator is configured -

Screenshot from 2016-07-04 11:45:59.png
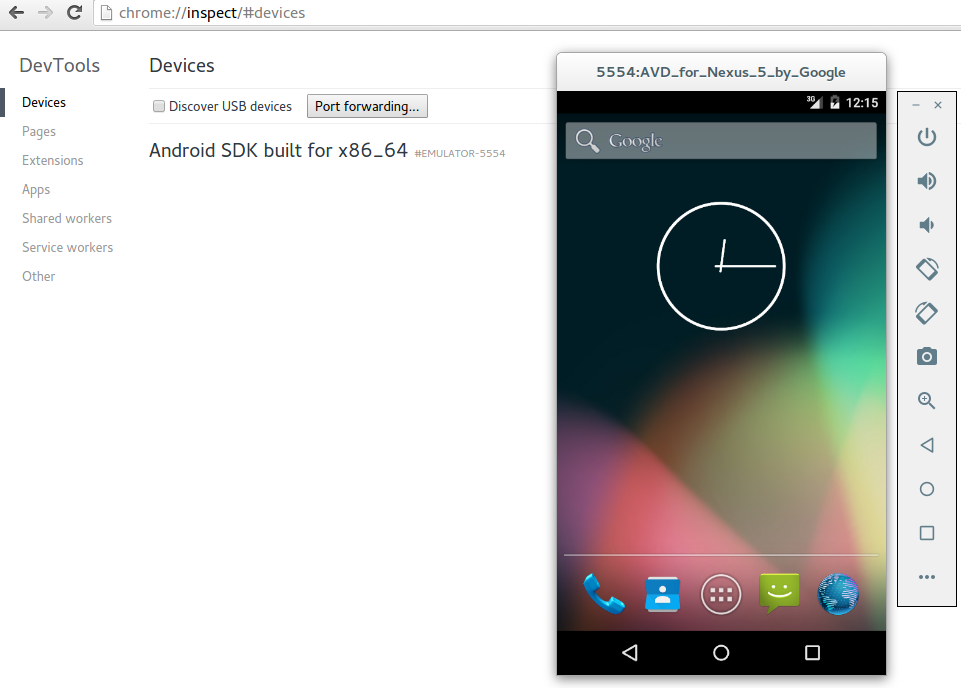
Make sure your emulator version is on Android 4.0 or higher. Once I launch the android emulator then it is listed on chrome inspect panel -

Screenshot from 2016-07-04 12:15:21.png


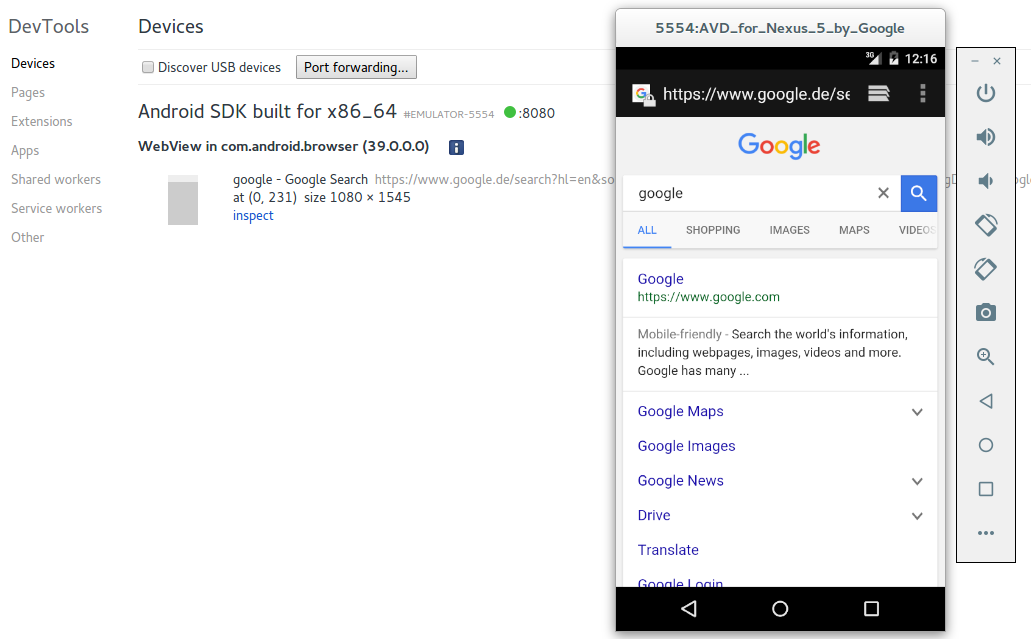
Launching the browser would display corresponding information on chrome inspect panel -

Screenshot from 2016-07-04 12:16:51.png


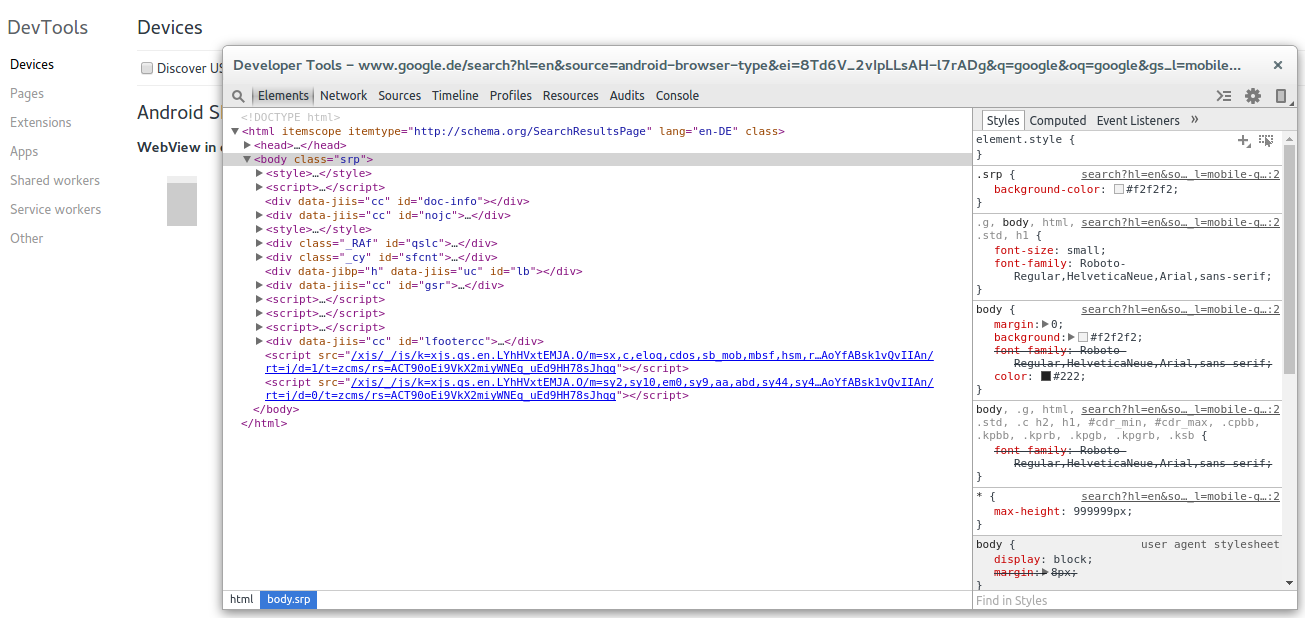
Click the inspect link and it would open bring developer toolbar, displaying the elements of mobile site just like a desktop website.

Screenshot from 2016-07-04 12:19:48.png


Click on the “Switch to portrait screencast” in developer toolbar and you will see image of emulator in developer tool bar -
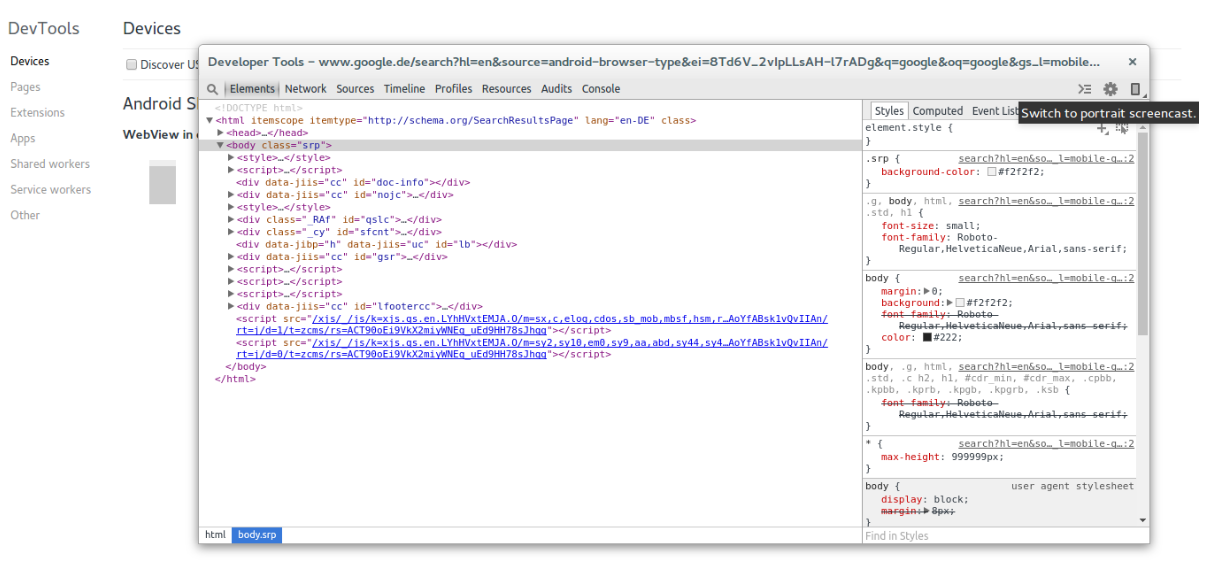
Screenshot from 2016-07-04 12:25:15.png


Hence no need to switch back and forth between chrome and mobile device/emulator as you will be able to drive the mobile site UI from within developer toolbar -
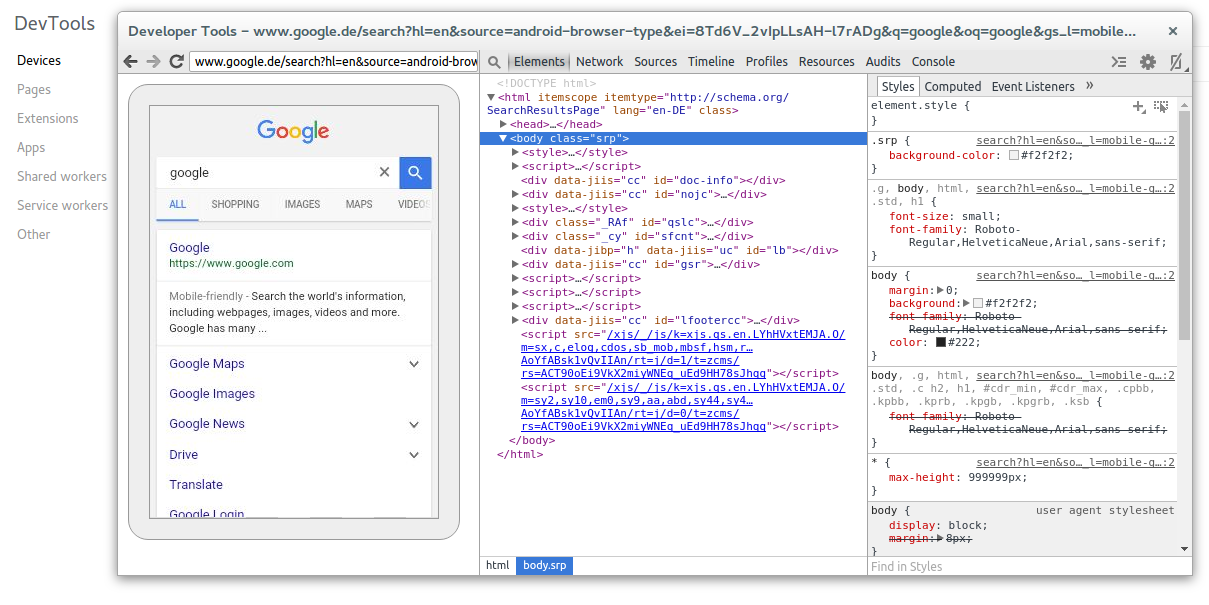

Screenshot from 2016-07-04 12:28:16.png


Doing any operation on device image on developer toolbar would also reflect it on emulator/device  -
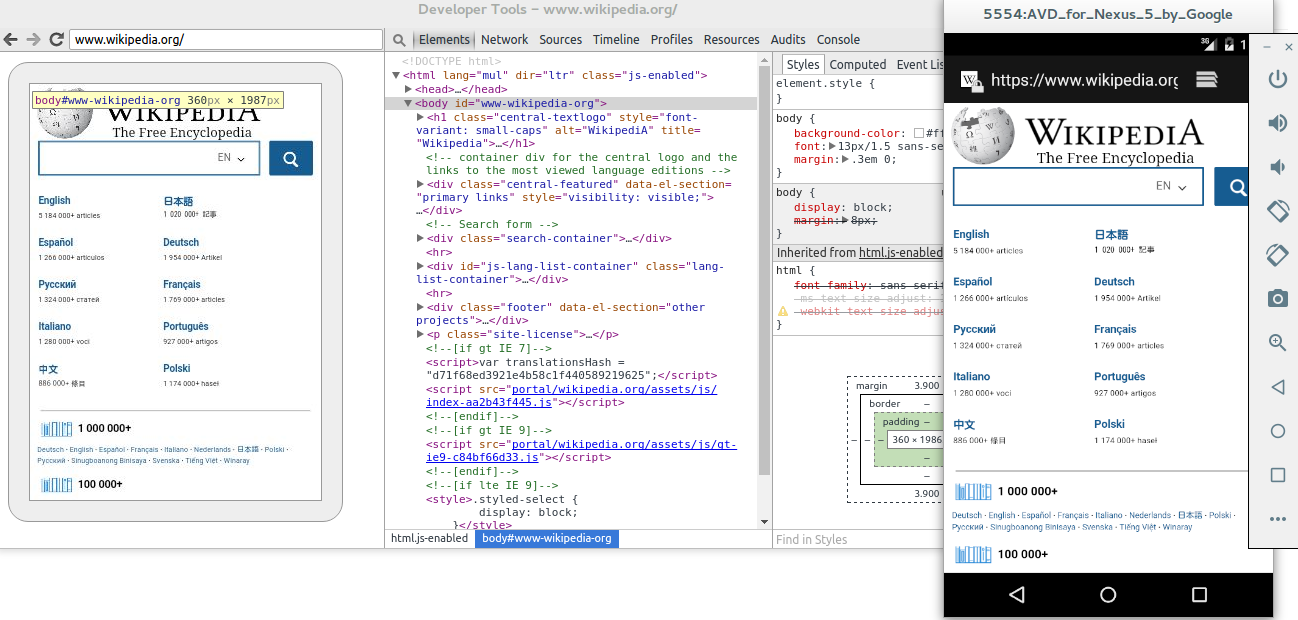

Screenshot from 2016-07-04 13:24:42.png


To bring control on a specific element, click the magnifying glass icon on developer toolbar and hover it on the element on which control is to be brought -
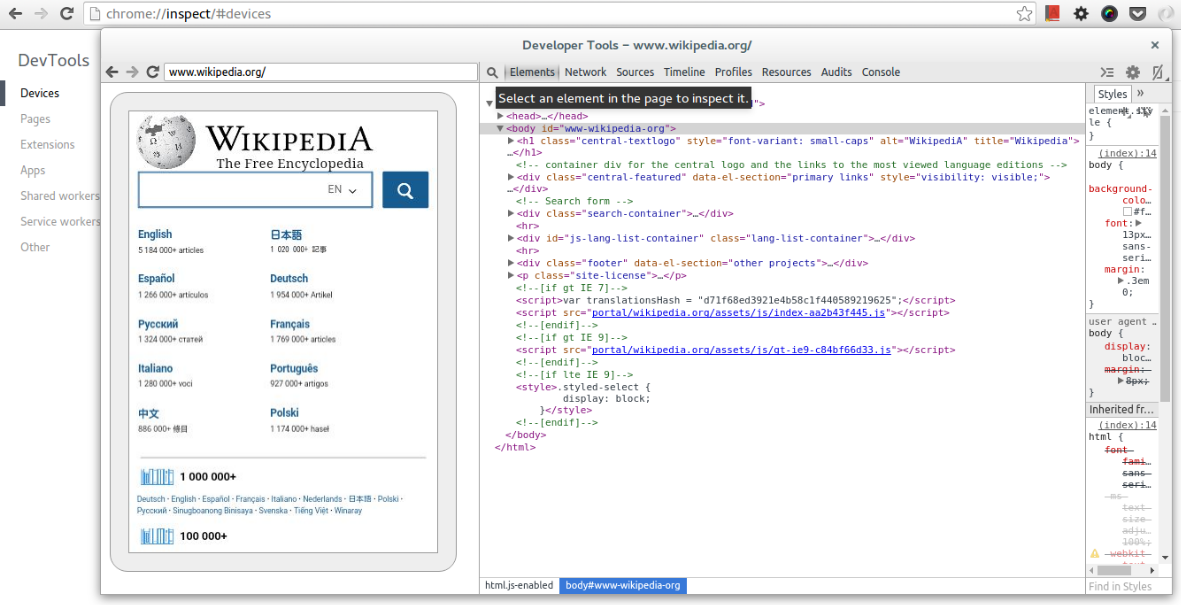
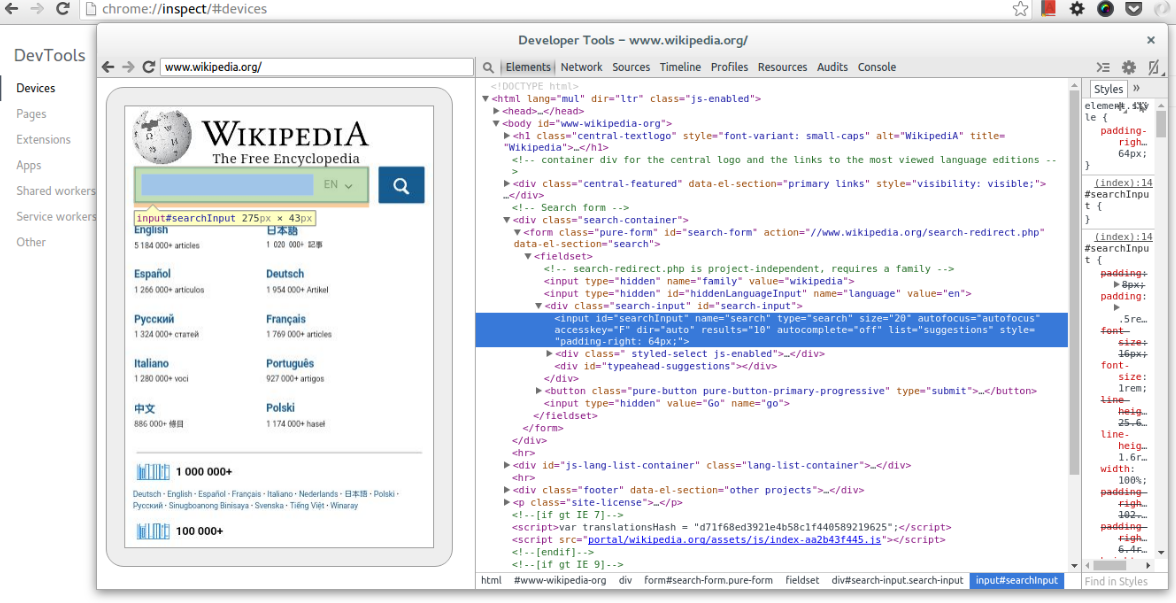
Screenshot from 2016-07-04 13:42:38.png


Screenshot from 2016-07-04 13:44:42.png


Now hit the escape key on your developer toolbar and start testing your element locators :)
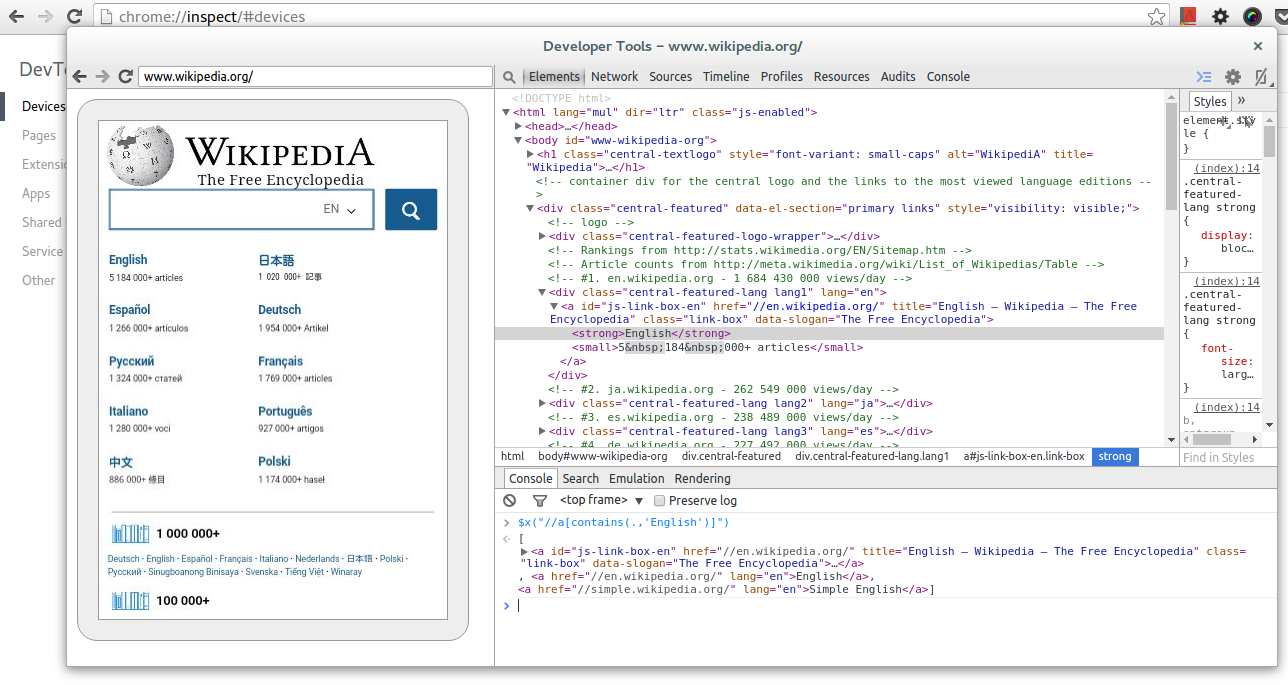

Screenshot from 2016-07-04 14:07:48.png


Screenshot from 2016-07-04 14:14:06.png


Popular posts from this blog

Verify email confirmation using Selenium WebDriver

Note: If you are new to java and selenium then start with selenium java training videos .   How to Verify Email Confirmation Using Selenium 4 and JavaMail (2026 Guide) Email confirmation is a critical part of most registration flows — account activation, password reset, multi-factor authentication, and onboarding. Every automation engineer eventually faces the same challenge: How do you verify an email confirmation link inside a Selenium test without making it slow and flaky? The wrong instinct is to automate Gmail's UI with Selenium. It's fragile, slow, and breaks constantly. The right approach: Use Selenium for browser automation Use JavaMail (IMAP) to read the email directly Extract the confirmation link Continue the test in Selenium Why Not Automate Gmail UI With Selenium? Automating the Gmail UI means logging in, searching, clicking a message, and parsing content from a third-party interface that changes frequently. This leads to: Flaky...

Using xPath to reach parent of an element

Note: If you are new to java and selenium then start with selenium java training videos .   I prefer css locator over xPath but there are times when css locators don't fit requirement. One such requirement is when you want to navigate to parent element of an element and may be parent of parent and even more. Unfortunately css locators don't provide any mechanism to navigate to parent of an element. See this for more. Of late I came across a scenario when I wanted to click on a link depending upon the text in a text box. Herein parent of text box and parent of link were at the same location. More over there could have been many such combinations in application. Fortunately I just need to pick first such instance and Web Driver any way considers only first instance when multiple locators are found matching an element. Element in question is in following html - Here I need to click on highlighted anchor on the basis of input element (which is also hig...

Real Time JMeter Result Using Backend Listener

Since JMeter 2.13 Backend Listener has been available to create real time graph of JMeter Test. Following tutorial explain the entire process in detail. At the end of this tutorial you would be able to create JMeter Live Test Result dashboard similar to following - This tutorial borrows information from many sources and my own experiments with JMeter live reporting dashboard. I have added source of information wherever applicable But before we can build such a snazzy JMeter Live Reporting dashboard we need to understand two more components - influxDB (a time series database) and Grafana Dashboard This is a big tutorial, so take deep breath :-) and follow on. Once you complete set up specified in this tutorial then you can watch JMeter Training Video Tutorial to watch this in action. What is Time Series Database? A time series is a sequence of data points , typically consisting of successive measurements made over a time interval . Examples of time ...